Cheap DIY Home Improvement Ideas: Home Upgrade [2024]
Are you prepared to make upgrades to your house without going over budget? 2024 has cheap DIY home improvement projects as the ideal option. This post will walk you through some quick and inexpensive methods to update your living area.
You will discover lots of inspiration, ranging from easy paint techniques to inventive storage solutions. These are not just inexpensive but also enjoyable projects to complete. Discover transformational ideas and techniques for your house by reading further.
Explore the DIY community to discover how minor adjustments may have a significant impact. Let’s go to work on giving your house a gorgeous look for less money!
Key Takeaways
- Refresh your front door with a new paint color for an affordable curb appeal boost.
- Upgrade lighting fixtures to brighten rooms that creates an instant impact on your home’s ambiance.
- Use peel-and-stick tiles to easily plus inexpensively transform your floors without major renovations.
- Upcycle old furniture with sanding, painting plus new hardware for a cost-effective as well as stylish update.
- Revamp your walls with a fresh coat of paint to enhance the room’s vibe affordably.
Refresh Your Front Door

Painting your front door is one of the easiest and most affordable ways to improve the curb appeal of your house. Considering that my door was dated plus worn out, I thought this was a simple, inexpensive effort that produced a significant impact. An inexpensive option is to improve your home’s exterior with a fresh coat of paint on a worn-out front door.
Choose a paint color that complements your home first. Your door might have a timeless appearance with a traditional hue, or it can stand out with a vivid color. Make sure the paint is weather-resistant and suitable for outdoor use.
Next, take off any hardware like locks or handles so you can paint evenly. Clean the door well to get rid of dirt and grime. If the paint is peeling or the door feels rough, sand it down to make it smooth. Use a primer if the old color is dark or if the door’s material needs it.
Now, you’re ready to paint. Use even strokes and apply at least two coats for full coverage. Let each coat dry fully before adding the next one.
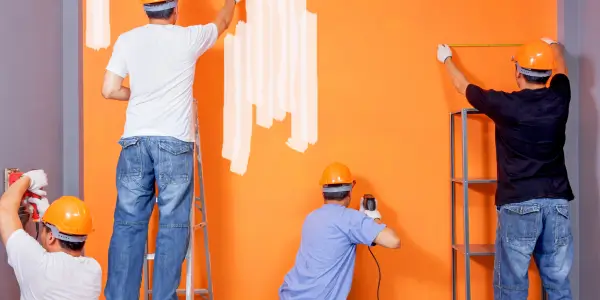
Revamp Your Walls with a New Paint Color
Painting your walls is an additional low-cost method to make your home’s appearance improved once you’ve tidied up the front entrance. A new paint job can transform the appearance plus atmosphere of a space. This is one of the most affordable DIY projects.
First, pick a color that matches the vibe you want. If you want a calm space, go for a soothing color. I found that soft blues, grays or neutrals make space feel modern as well as cozy. If you are feeling bold, try a rich deep color for a touch of elegance.
Next, gather your supplies. You will need paint, primer, brushes, rollers, painter’s tape with something to protect the floors. Start by getting the room ready. Move the furniture, cover the floors plus tape off areas you don’t want to paint. I always use a primer to make sure the paint sticks well in addition to looking smooth.
Once the primer is dry, paint your walls. Use a roller for big areas besides using a brush for corners plus edges. Let the first coat dry, then add a second coat to make sure the color is even. With just a little effort, you can completely transform the room.
Create a Stylish Coffee Table on a Budget
Why not transform your living room with a stylish coffee table you can make yourself on a budget? This DIY project isn’t only affordable but also a great way to modernize your space. By using basic supplies like wood rounds, a dowel and some paint, you can create a mid century inspired coffee table that looks great and costs a fraction of the store bought version.
Here’s a simple step by step guide:
- Gather Your Supplies: You will need wood rounds, a wooden dowel, screws, sandpaper, wood stain or paint with a drill. The items are easy to find and would not break the bank.
- Assemble the Table: Start by sanding the wood rounds with dowel to smooth out any rough edges. Attach the dowel to the center of the wood rounds using screws with a drill. Confirm everything is securely fastened.
- Finish and Style: Once assembled, apply your choice of wood stain or paint. This step allows you to customize the look to match your existing décor.
This simple DIY task is a fantastic way to achieve a stylish coffee table without spending a lot. It’s a perfect addition to any home improvement plan aiming for a low maintenance, modern look.
Upgrade Your Lighting for Instant Impact
Updating your lighting is a quick as well as cost-effective way to transform any room. A simple upgrade of light fixtures can make a huge difference. Outdated fixtures often make a room look old, but new ones can fix it easily. I recommend checking out local home improvement stores. You will find many stylish fixtures at a very good prices.
First, think about which rooms need a change. Kitchens, bathrooms and living rooms are usually good places to start. Then, measure the space where the new fixture will go. This makes sure it fits well. Choose a style and finish that matches your decor.
Once you choose a fixture, follow the manufacturer’s instructions to install it. Usually, this means turning off the power, removing the old fixture to connect the new one.
Installing a new light fixture can instantly brighten a room making it look fresh plus modern. By selecting affordable options, you can make a big impact without spending too much.
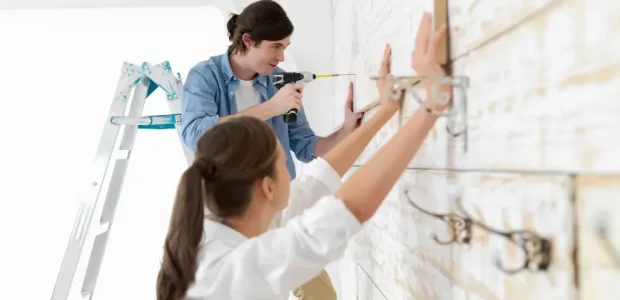
Refresh Your Floors with Peel-and-Stick Tiles
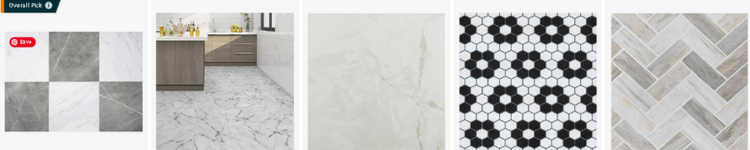
I have found that peel-and-stick tiles are a fantastic way to freshen up your floors without spending too much. They are super easy to use, also they do not require a big renovation. Here it is how you can use them to transform your old floors:
- Preparation:
First, clean your floor well. Make sure that there is no dust, dirt or grease. A clean surface helps the tiles stick better. - Layout Planning:
Before you peel off the backing, lay out the tiles to see how they fit. This helps you avoid problems and makes sure the floor looks nice. You might need to cut some tiles to fit along the edges. - Installation:
Start from the center of the room till you work your way out. Peel off the backing and press each tile down densely. Smooth out any bubble ups that are in the peel. The stickiness is strong, so it is hard to move the tiles once they are stuck.
I love how easy these tiles are to install. It is a perfect DIY project. You can upgrade your floors without spending a lot or doing a big renovation.
Declutter and Organize Your Space

After freshening up your floors, let’s move on to decluttering as well as organizing your space. I have found that decluttering makes my home feel more cozy plus spacious.
I start by sorting through my stuff ending with deciding what to keep, donate or throw away. Being honest with myself about what I need helps reduce stress.
Once I’ve decluttered, I focus on organizing. Smart storage solutions help me make the most of my space.
I love using storage bins, shelves and baskets that fit well in my home. Labeling these containers makes it super easy to find things quickly.
Thinking vertically is a game-changer for storage. Wall-mounted shelves and hooks free up floor space and keep my items handy.
Under-bed storage boxes are another great way to use often overlooked areas.
Multi functional furniture is also a big help. Ottomans with hidden compartments or beds with built-in drawers give me extra storage without taking up more space.
Spruce Up Your Outdoor Space
Transforming your outdoor space into a cozy haven does not have to be expensive. With some easy DIY projects, you can make the exterior of your home already welcoming.
Here are a few tips to clean up your outdoor area:
- Add Potted Plants: I found that adding potted plants brightened up my outdoor area. I chose a mix of flowering plants, succulents and small trees. Placing them around my seating area made it feel more natural and cozy.
- Hang String Lights: String lights are my go-to for creating a magical outdoor retreat. I hung them across my patio, around our pergola and along the fence. They give off a soft ambiance that’s perfect for evening gatherings. It makes the space feel more inviting.
- Create a Cozy Seating Area: A comfy seating area is a must. I arranged some outdoor furniture and added cushions and throw blankets. This setup makes it so inviting that we spend way more time outside now.
Using these simple steps, I have turned my outdoor space into a more inviting and enjoyable place.
Upcycle Old Furniture
I love upcycling old furniture. It’s a great way to make my home look new without spending much money. Plus, it’s good for the environment because it reduces waste.
First, I always start by sanding the piece. This step is crucial because it removes the old finish and gets the surface ready for paint or stain. I use medium-grit sandpaper first and then switch to fine-grit for a smooth finish. Sanding makes sure the paint or stain sticks well.
Next, I pick a paint color that matches my home decor. Painting old furniture can change its look. I always use a primer first to make the paint go on smoothly and last longer. Applying thin, even coats of paint and letting each layer dry completely is key.
Finally, I like to add new hardware. Swapping out old knobs, handles or pulls can instantly update the furniture. I choose hardware that fits the new style I’m going for, whether it’s modern, vintage or rustic.
Upcycling old furniture saves me money that may help the environment. It is a win-win!
Conclusion
Cheap DIY home improvement projects are the best overall ways to transform your house on a budget. From refreshing your front door and upgrading your lighting to using peel and stick tiles. Also upcycling old furniture ideas are easy to execute and cost-effective. I found that a fresh coat of paint, creative storage solutions together with stylish DIY furniture can make a big impact without a hefty price tag. These projects not only improve your living space but it also provide fun as well as rewarding ways to personalize the home. Dive into these DIY projects to see how small changes can make a big difference!